Tour of the window
Learn the name and job of each part of the Mock Studio window, so the other pages make sense when they say "the rail" or "the response card".
The pictures show the sample project, My First Mock API. The port in them is 38063; on your computer the sample project uses 8080 unless you change it.
The whole window
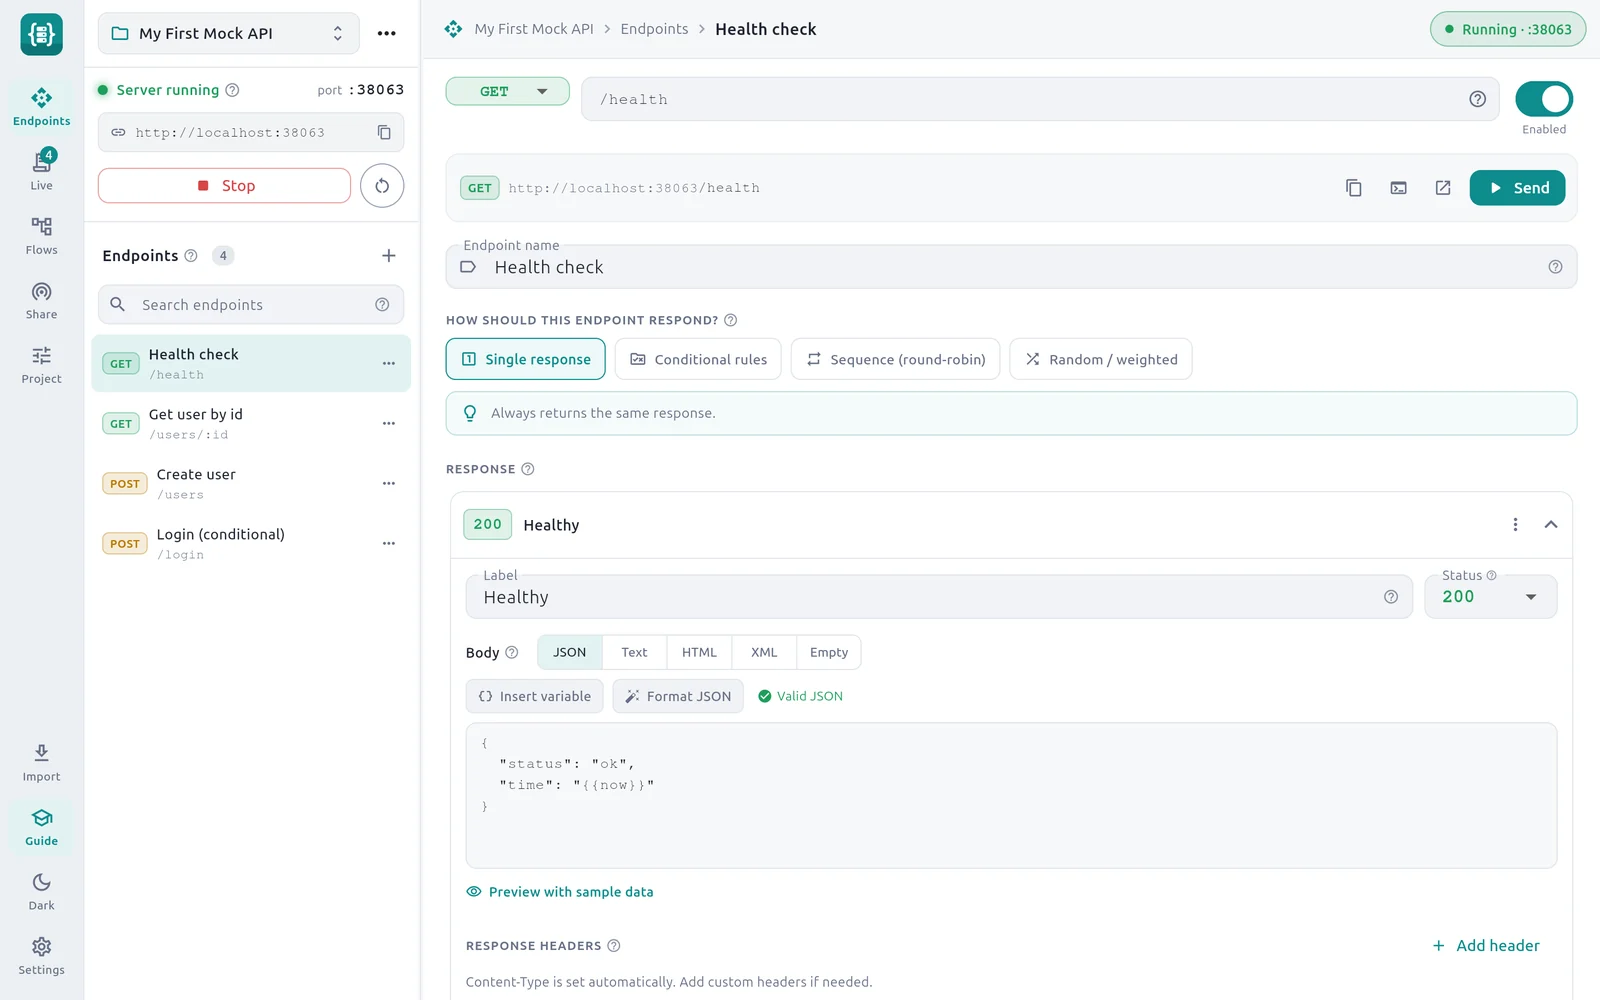
- 1Rail — Switches between the five sections of a project.
- 2Project switcher — Shows the current project. Click to switch or create one.
- 3Server control card — Starts and stops the server and shows its address.
- 4Endpoints list — Every endpoint in the project. Click one to edit it.
- 5Breadcrumbs — Where you are: project, section, folder and endpoint.
- 6Status pill — Running or Stopped. Click it to start or stop the server.
- 7Main area — The section chosen in the rail. Here it is the endpoint editor.
The window has three columns. The rail on the left chooses a section. The side panel next to it holds the project switcher, the server control card and the endpoints list. The main area shows the section you chose.
Drag the line between the side panel and the main area to make the panel wider or narrower. Click the active rail item again to hide the panel, and once more to bring it back.
The rail
- 1Endpoints — Design endpoints: method, path and responses.
- 2Live — Every request that reaches the server. The badge counts them.
- 3Flows — Send scripted traffic with many virtual users.
- 4Share — Addresses for other devices, a QR code and public tunnels.
- 5Project — Port, CORS, proxy, global delay and global headers.
- 6Import — Create endpoints from Postman, OpenAPI or a project file.
- 7Guide — Turns extra hints for newcomers on or off.
- 8Settings — Theme, hover help and the projects folder.
The top five items are sections of the current project:
| Rail item | Opens | Read more |
|---|---|---|
| Endpoints | The endpoint editor | Endpoints and paths |
| Live | The live request log | Live request log |
| Flows | Load and user-journey runs | Flows |
| Share | Share and expose | Share on LAN or the internet |
| Project | Project settings | Auth, CORS and project settings |
The bottom items apply to the whole app. Import opens a menu with From Postman collection, From OpenAPI / Swagger and Mock Studio project file. Guide shows or hides extra hint lines, such as the sentence under the strategy chooser. Dark (or Light) switches the Teal theme between light and dark. Settings is described in Settings and themes.
The side panel
- 1Project switcher — Lists your projects with their ports, plus New project.
- 2Project menu — Rename, Duplicate, Export to file and Delete.
- 3Server status — Server running or Server stopped, with the port on the right.
- 4Base URL — The address of the mock on this computer. Click to copy it.
- 5Stop — Stops the server. When it is stopped, this is Start server.
- 6Restart server — Stops and starts again. Open connections are dropped.
- 7New endpoint — Adds a blank endpoint or one from a template.
- 8Endpoint actions — Disable, Move to folder, Duplicate and Delete.
Project switcher
A project is one mock API: a set of endpoints served together on one port and saved as one file. The switcher shows the current project. Click it to pick another project or choose New project. Each entry shows whether that project's server is running and which port it uses. Several projects can run at once, each on its own port.
The ⋯ button beside it opens the project menu. See Projects, files and Git.
Server control card
The card shows Server stopped or Server running, the port, and one large button: Start server when stopped, Stop when running. While the server runs, the card also shows the base URL, such as http://localhost:8080, and a round Restart server button.
Changes you make to endpoints apply straight away. You do not need to restart the server after an edit.
Endpoints list
The list shows each endpoint's method, name and path, with a count beside the Endpoints heading. Use Search endpoints to filter by name, path, folder or method. Endpoints can be grouped in folders; folders only organise the list and do not change any URL.
The endpoint editor
- 1HTTP method — The request method this endpoint answers, or ANY.
- 2URL path — The path clients call. The ? button lists the path patterns.
- 3Enabled — When off, the server ignores this endpoint.
- 4Send — Sends a test request to the running server.
- 5Endpoint name — A friendly name for the list and the Live log.
- 6Strategy chooser — How the endpoint picks one of its responses.
- 7Response card — One reply: status, label, body and headers.
From top to bottom:
- Method and path. These decide which requests the endpoint answers. See Endpoints and paths.
- Test bar. The row with the full address and the Send button is the built-in tester. Its three small buttons are Copy URL, Copy as cURL command and Open in browser.
- Endpoint name. It does not affect matching.
- How should this endpoint respond? The strategy chooser, below.
- Response or Responses. One card per response.
- Advanced settings, below the responses. It holds Latency simulation, Authentication and Description / notes. An active tag appears on it when a delay, jitter or required auth header is turned on.
Strategy chooser
The four buttons under How should this endpoint respond? decide which response is sent when the endpoint has more than one.
| Button | What it does |
|---|---|
| Single response | Always sends the first response. |
| Conditional rules | Sends the first response whose conditions all match the request. |
| Sequence (round-robin) | Sends the responses in order, one per request, then starts again. |
| Random / weighted | Picks a response at random, by weight. |
With Guide on, a hint line under the buttons explains the selected strategy. Response strategies has worked examples of each.
Response card
- 1Response menu — Duplicate this response, or delete it when there is more than one.
- 2Label — A name for the response. It appears in the Live log, never in the reply.
- 3Status — The HTTP status code sent back.
- 4Body type — JSON, Text, HTML, XML or Empty. It also sets the Content-Type.
- 5Insert variable — Adds a placeholder that is filled in for each request.
- 6Body — The content sent back to the client.
- 7Preview with sample data — Shows the body with placeholders filled in.
- 8Add header — Adds a custom response header.
Click a card's header to collapse or expand it. The header shows the status code and the label, plus small tags when the response has a fault, a weight or rules. Further down the card are Delay override (ms) and Fault injection. Responses describes every field.
Hover help
Every field, button and badge has a question-mark icon. Point at it to see a card with a title, a plain explanation and an example. On a touch screen, tap the icon.
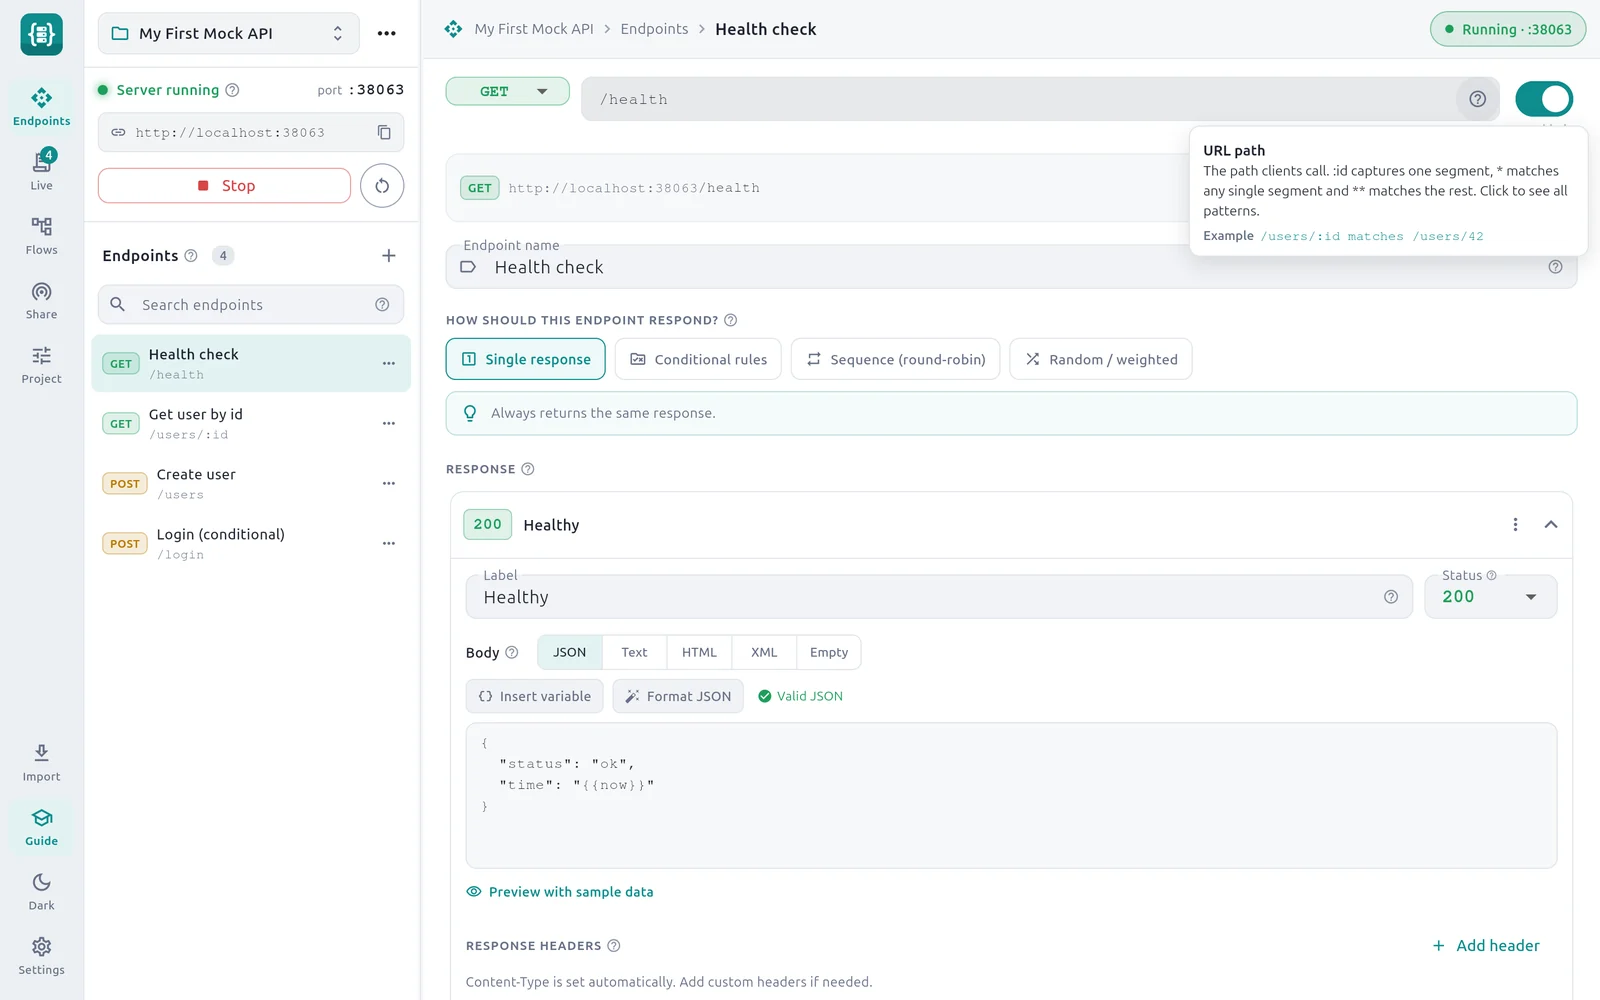
Turn hover help off in Settings once you know your way around.
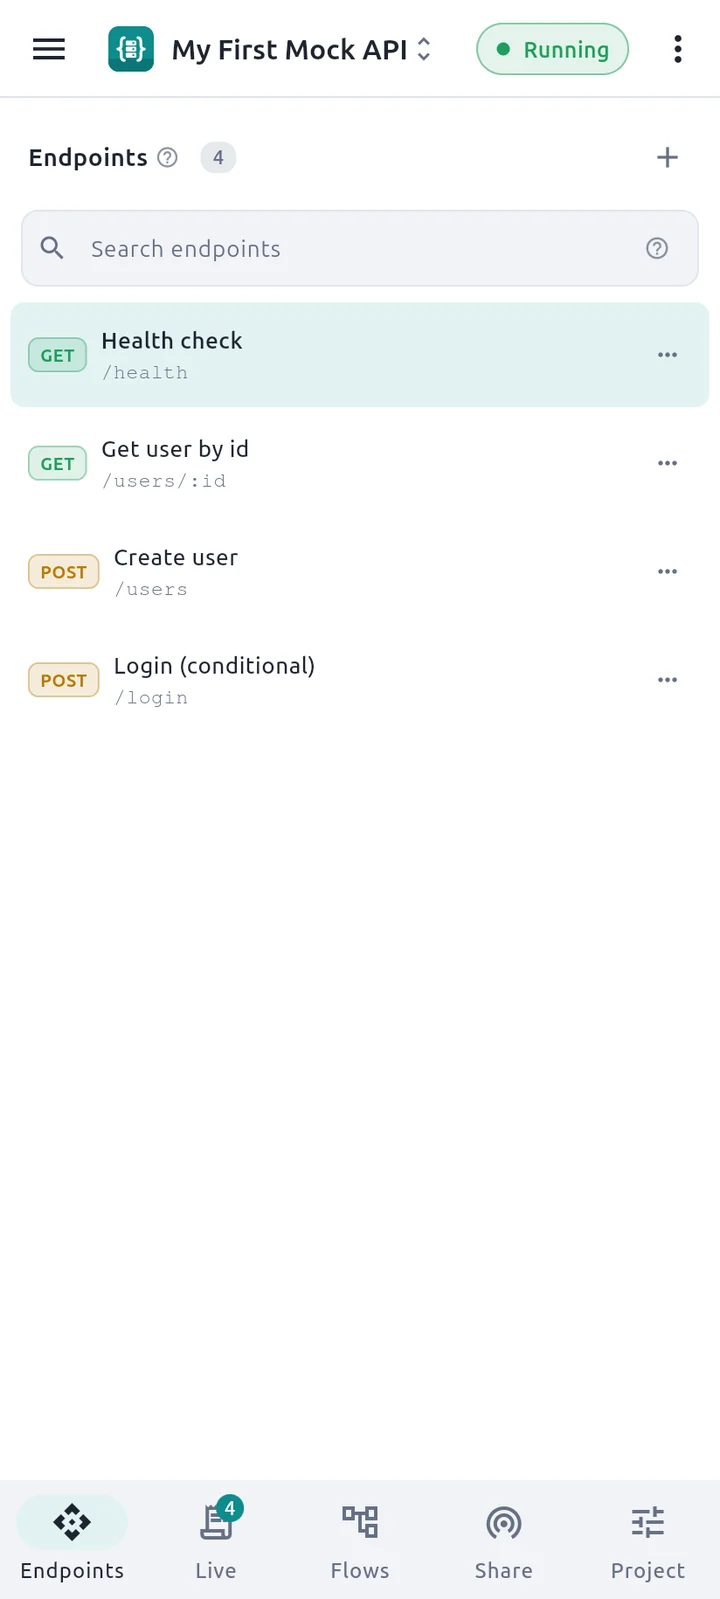
On a small screen
When the window is narrow, Mock Studio uses a phone layout. The rail becomes a bar at the bottom, the endpoints list fills the screen, and an endpoint opens as its own page with a back arrow. The ⋮ menu at the top right holds import, guide mode, the theme switch and Settings.